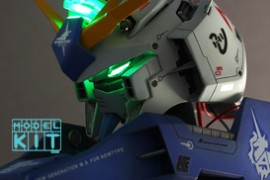
RX-93 Hi-Nu Gundam Head Resin Kit [The Making]
4.17.2024 04:50pm
1905
0
(੭。╹▿╹。)੭
Hello everyone Yes, this is my first time using a resin kit, and there has been a lot of hand touch-up work done on it. Finally, I've found some time to share this moment with you guys. This kit was purchased on eBay; it is a recast, making it less expensive than the original G System. Since this is my first resin kit, I'll choose a less expensive choice for my initial test project. Yes, once I've mastered my skill, I'd love to own a G System.
嗨~大家!這次終於能夠有時間與大家分享以下鋼彈模型的製作過程,這也是小生初次接觸 Resin Kit,接著需要面對許多修補瑕疵的工作。這是透過eBay購買回來的仿製品,當然價格也比正品G System來得低。由於這是初次嘗試Resin Kit的模型組裝,所以就選擇價錢較實惠的模型當作試驗品。希望有朝一日有所成績,將勇往昂貴的G System!
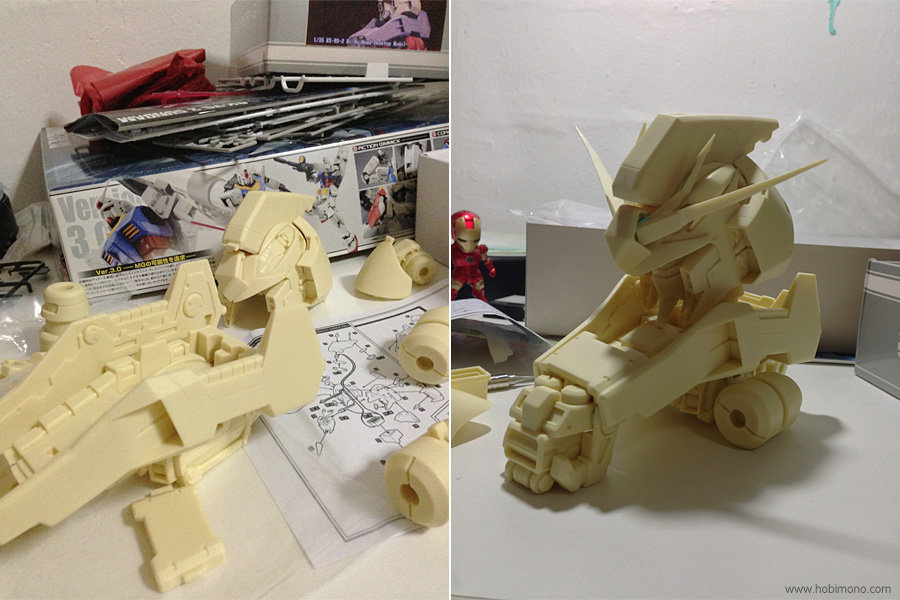
▲ Let's first try a quick assembly to see how it turns out. Not too bad, right? Although it requires glue because all the pieces are loose. I choose "Magnet" (will describe it in a later phase), which is the greatest option.
首先大概的組裝一下,看看整體是怎麼樣的。整體看起來還不錯哦,由於全部部分都還是分散的,必須把每個部分粘接起來。於是小生選擇使用 “磁石相接”(關於這個細節將會在接下來的步驟中與大家分享)。
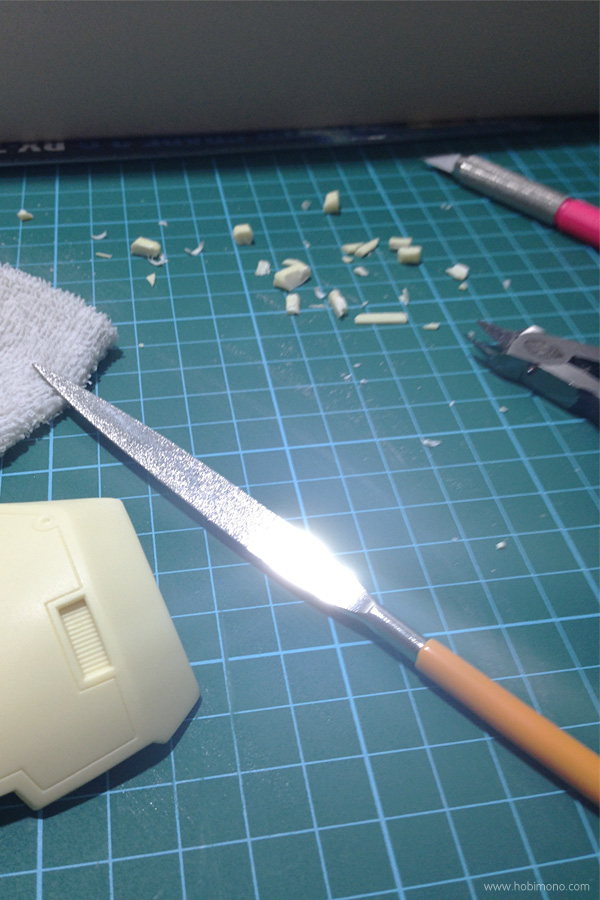
▲ I use this tool to sharpen the edge in order to reduce the gap when assembling both sides together.
这是用来修磨边缘的工具,使表面平滑和减少組裝後的缝隙。
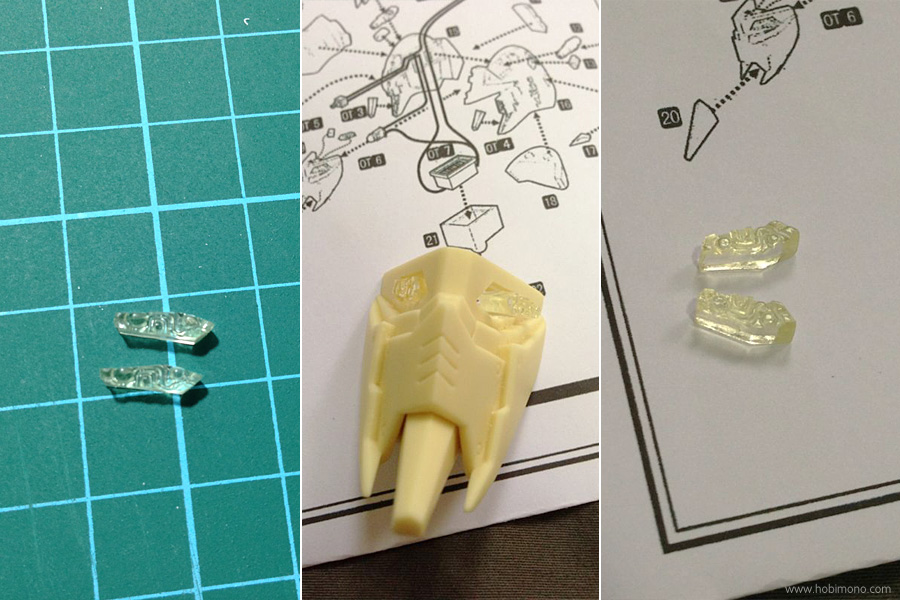
▲ This is the eyes section; it is made of a translucent material that allows the LED light to enter through. However, this is strange because left and right sides should be facing in the opposite directions. Fortunately, though, my friend also purchased the same kit and experienced the same issue, so we exchanged, and the issue was resolved.
這是眼睛部分;它由半透明材料製成,可讓LED光透過。 然而,這很奇怪,因為左右眼兩側應該朝向相反的方向,可是這裡只有兩隻右眼。不過還好,小生有個同好也買了同樣的套件,剛巧他也遇到了同樣的問題,所以我們互相交換欠缺的眼睛,才把問題給解決了。
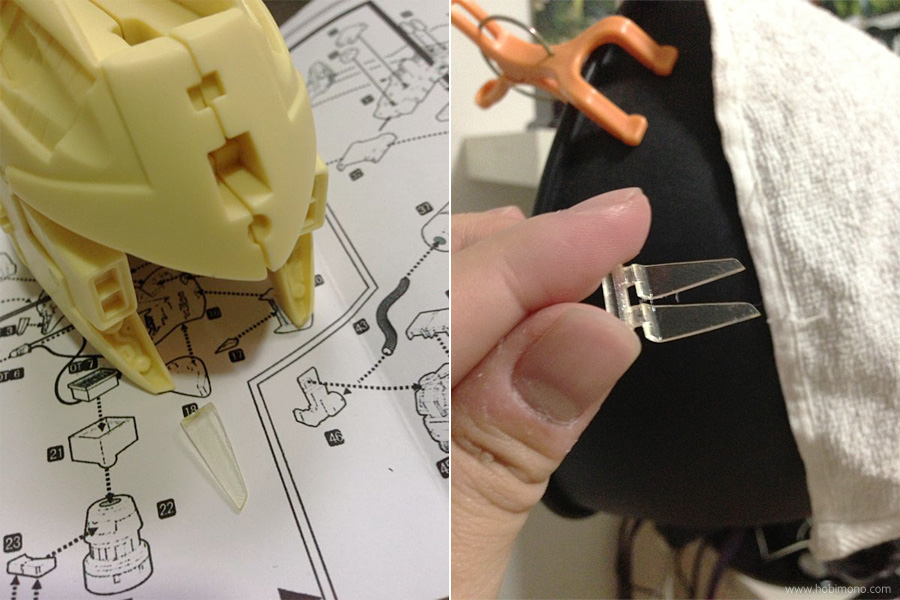
▲ I'm guessing there's also a recast error in this part.
猜想这部分應該也是仿製品的失误。
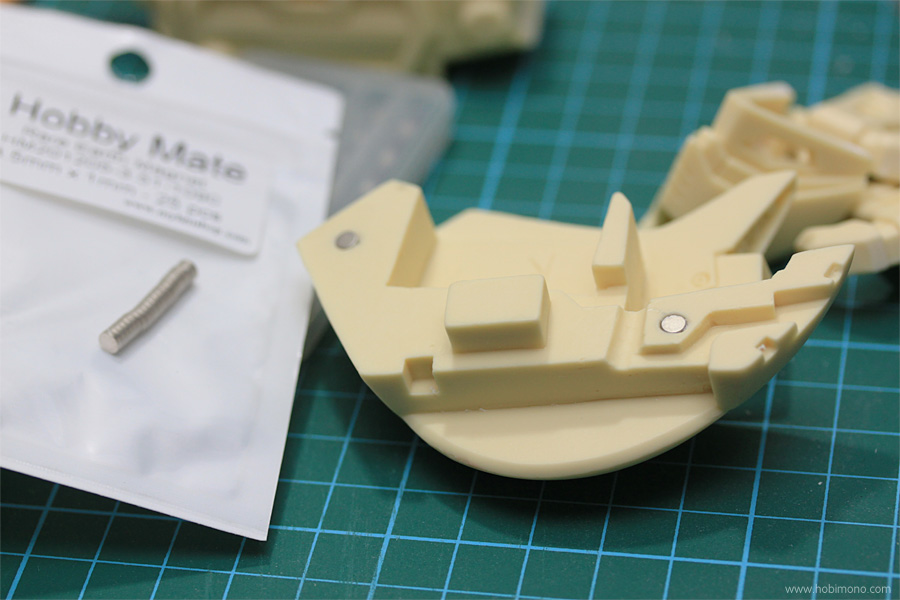
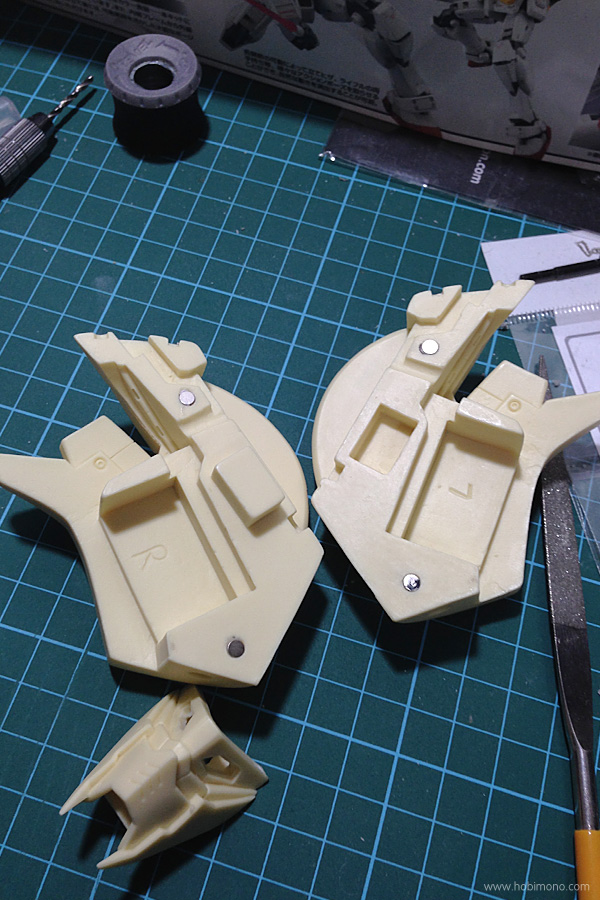
▲ This is the magnet choice that I recently talked about. Very simple, just pick a drill bit that is the same size as the magnet, drill it, then glue the magnet in. Just to be on the safe side, mark the magnet's depth on the drill before you start drilling the hole.
這就是小生之前所提到選用磁鐵的事。很簡單,只需要選擇一個與磁鐵大小相同的鑽頭,然後鑽孔,再將磁鐵嵌入。為了安全起見,建議在開始鑽孔之前在鑽頭上標記磁鐵的深度。
這就是小生之前所提到選用磁鐵的事。很簡單,只需要選擇一個與磁鐵大小相同的鑽頭,然後鑽孔,再將磁鐵嵌入。為了安全起見,建議在開始鑽孔之前在鑽頭上標記磁鐵的深度。
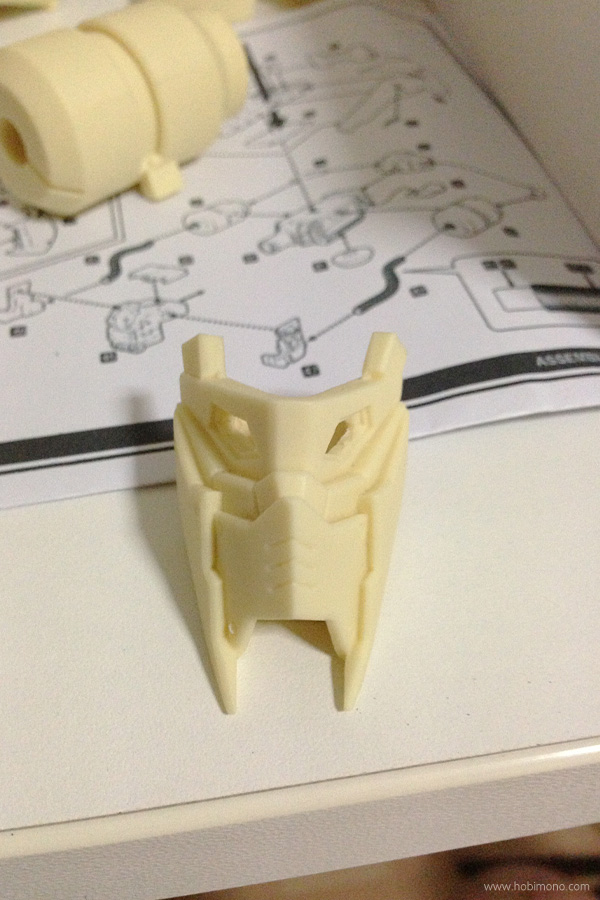
▲ Facial portion. I'm most irritated in this section. Because I believe the eyes area really looks horrible particularly when seen from the front. There seems to be something wrong with or missing. I therefore made the decision to "add on" to it.
面部部分,這部分是小生最厭倦了。因為小生相信眼睛部分看起來真的很可怕,尤其是從正面看的時候。整體看起來似乎有著什麼問題或缺失。因此,小生決定為它增添一些小細節。
面部部分,這部分是小生最厭倦了。因為小生相信眼睛部分看起來真的很可怕,尤其是從正面看的時候。整體看起來似乎有著什麼問題或缺失。因此,小生決定為它增添一些小細節。

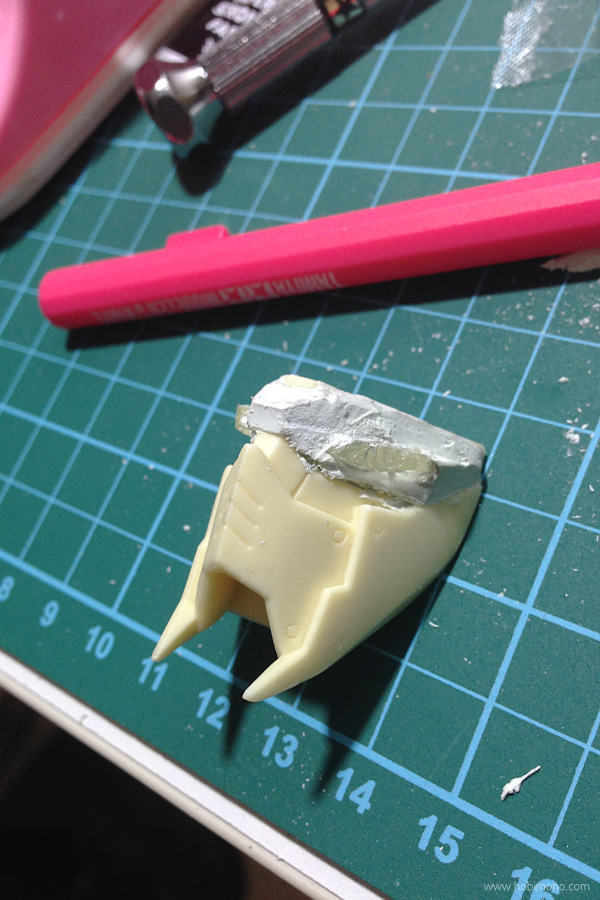
▲ I initially tried to sculpt the area with epoxy putty, but it was difficult because the available area was so small. It has thus failed.
小生最初嘗試使用環氧黏合膠泥雕刻該部位,但是真的很難,因為可雕刻的區域太小了,終告失敗。
小生最初嘗試使用環氧黏合膠泥雕刻該部位,但是真的很難,因為可雕刻的區域太小了,終告失敗。
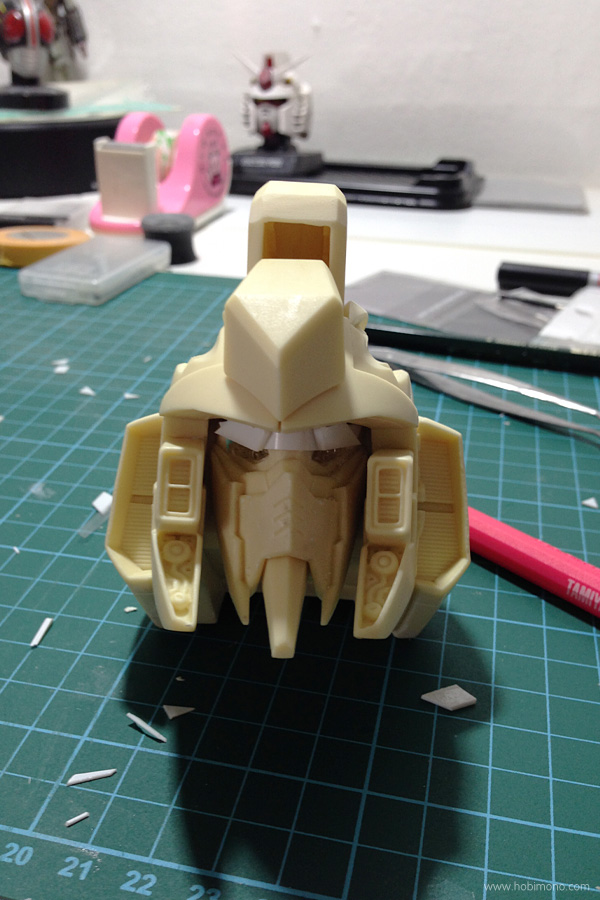
▲ I'm now using "Pla Plate", and though it's my first time using it, I love it. The initially designed design I came up with looked like an unhappy face, so I removed it.
這是小生第一次接觸與使用 “Pla Plate” 就已經愛上了它。最初的設計的臉看起來就像個傷心臉,所以小生決定把它給卸下了。
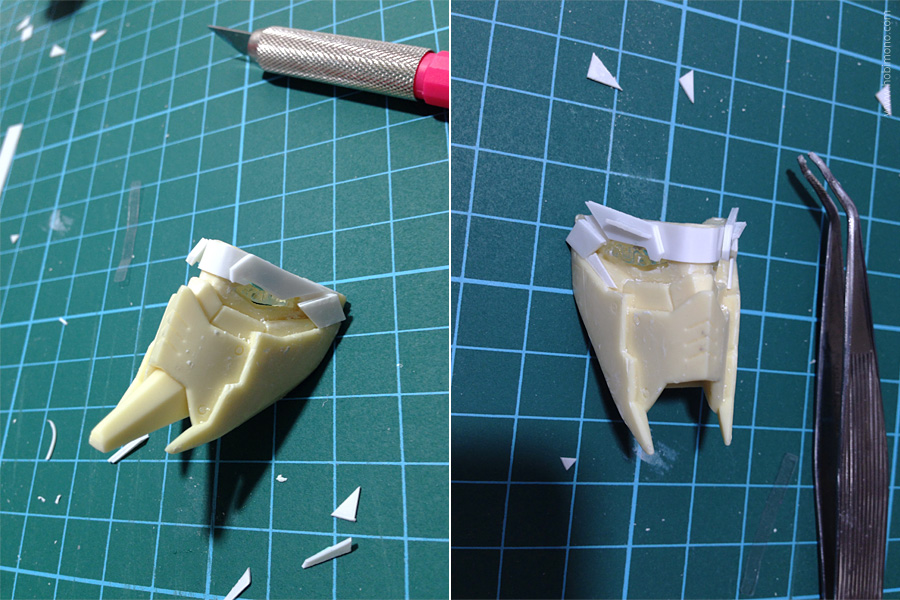
這是小生第一次接觸與使用 “Pla Plate” 就已經愛上了它。最初的設計的臉看起來就像個傷心臉,所以小生決定把它給卸下了。

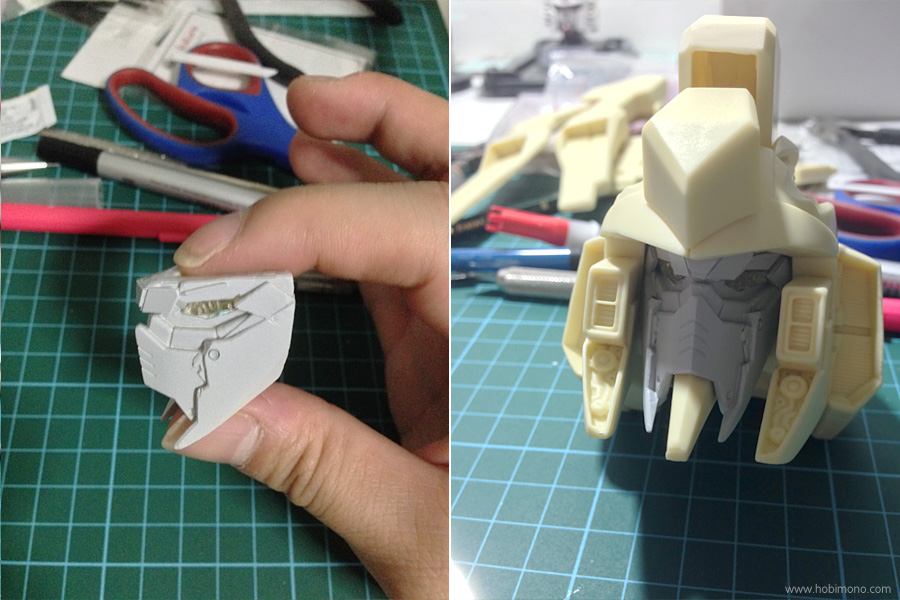
▲ This is the alternative choice which I would select. I believe I'm on the right direction, so keep going!
這是小生即將選擇的做法。相信朝著這方向會是正確的,繼續前進!
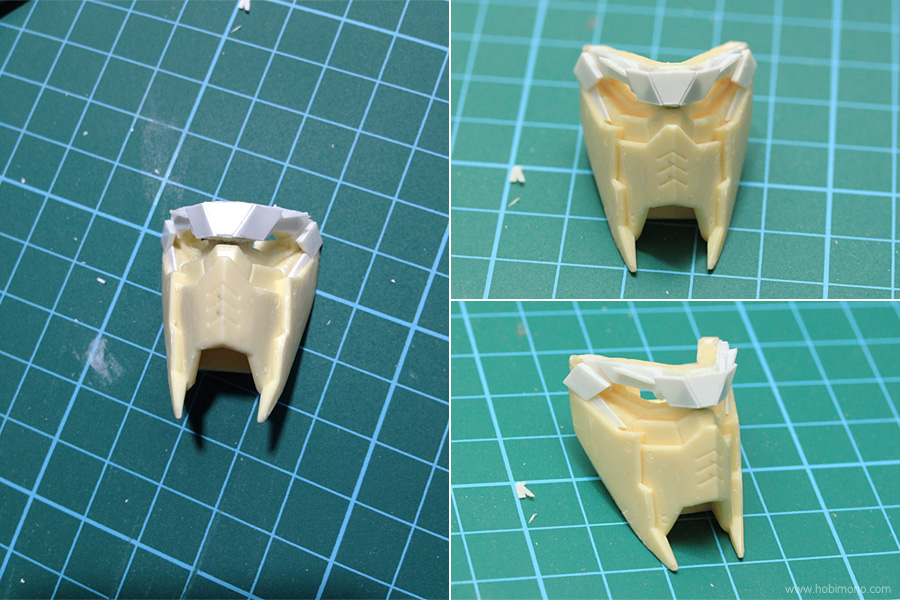
這是小生即將選擇的做法。相信朝著這方向會是正確的,繼續前進!

▲ Finally!! I believe it looks better? or only myself? Well... Let's check how it appears when the other pieces have been assembled.
最後!!相信整體上看起來更好了?還是只有小生自己?好吧…… 讓我們再看看當其他部件組裝好後是怎樣的吧。
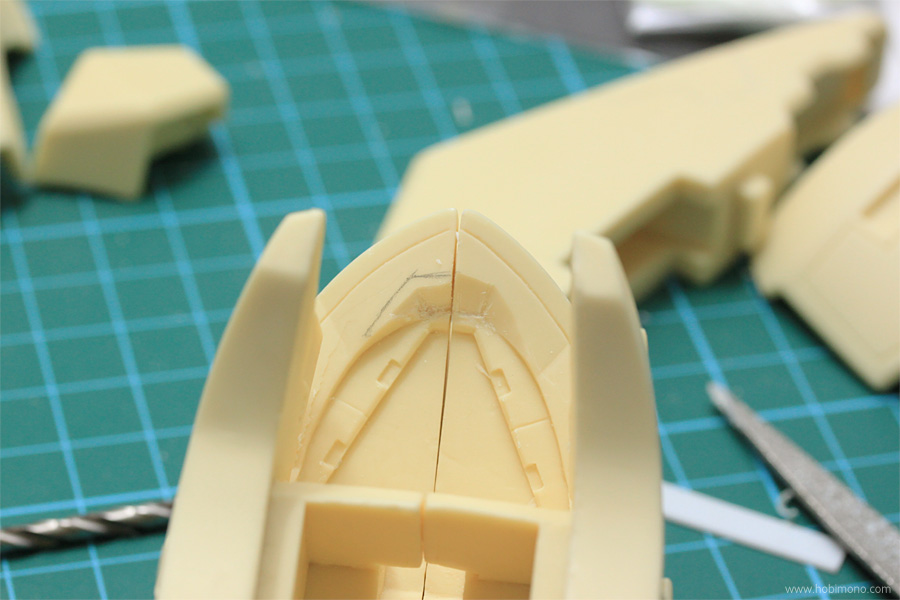
最後!!相信整體上看起來更好了?還是只有小生自己?好吧…… 讓我們再看看當其他部件組裝好後是怎樣的吧。

▲ Oh no, there's a new problem; once I extended the face plate, it won't fit, therefore I'll have to make the inner space larger to accommodate the face.
天哪,又來了一個新的問題; 一旦加寬了面板,它就放不下了,所以必須讓內部空間更大才可以容納進去。
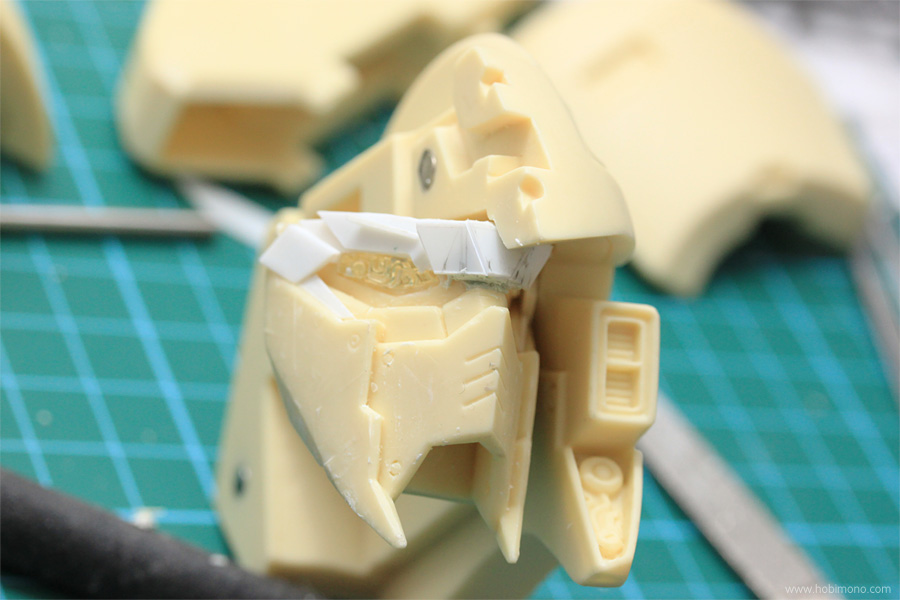
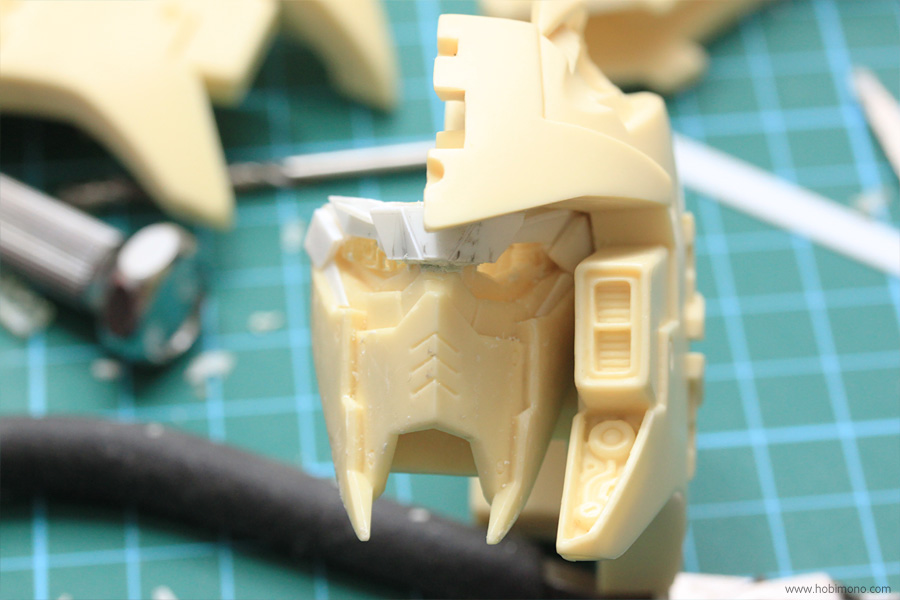
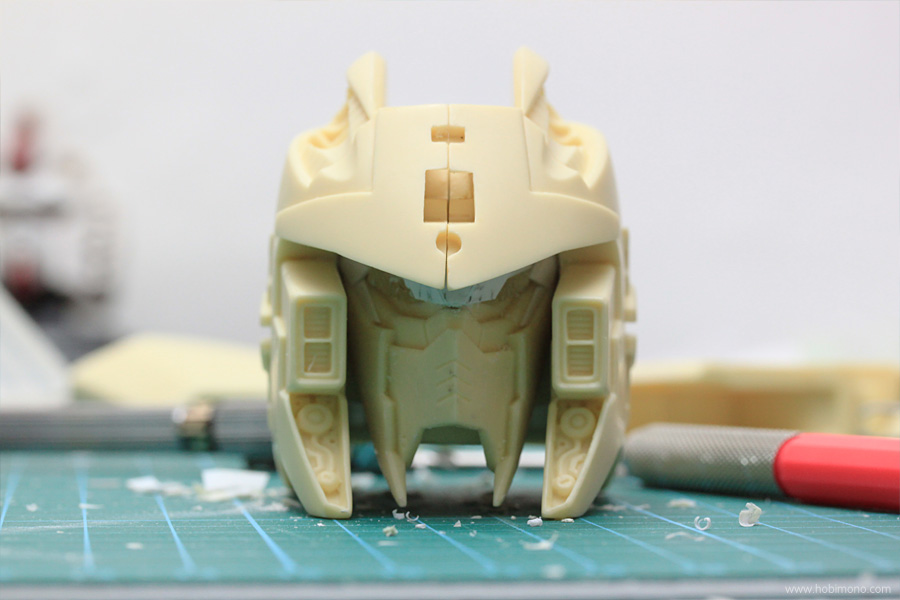
天哪,又來了一個新的問題; 一旦加寬了面板,它就放不下了,所以必須讓內部空間更大才可以容納進去。


▲ Here we go!
組裝起來了!
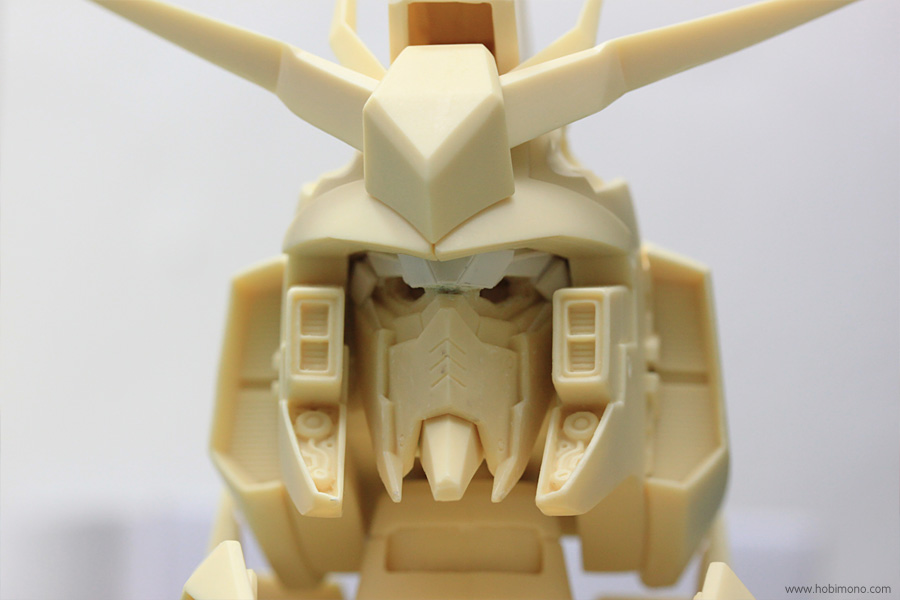
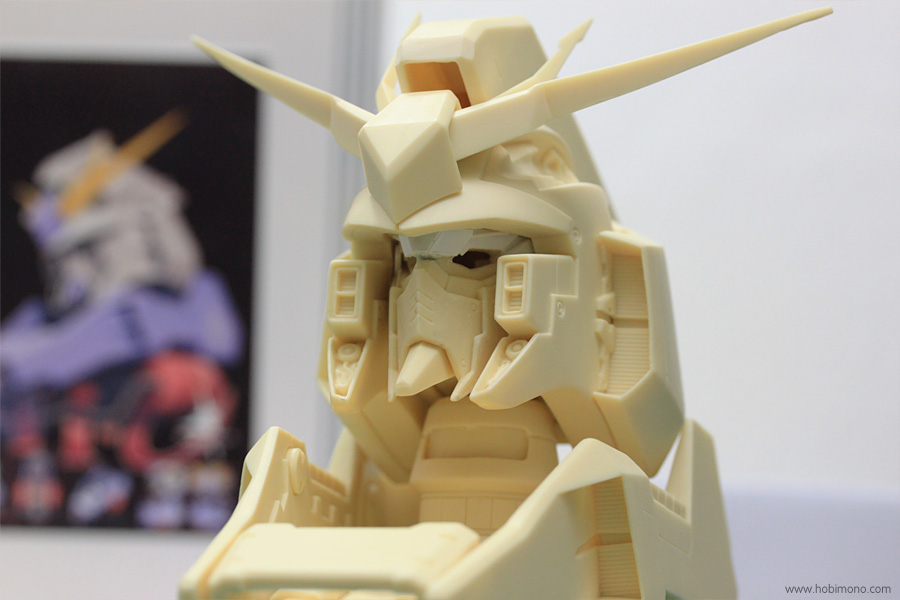
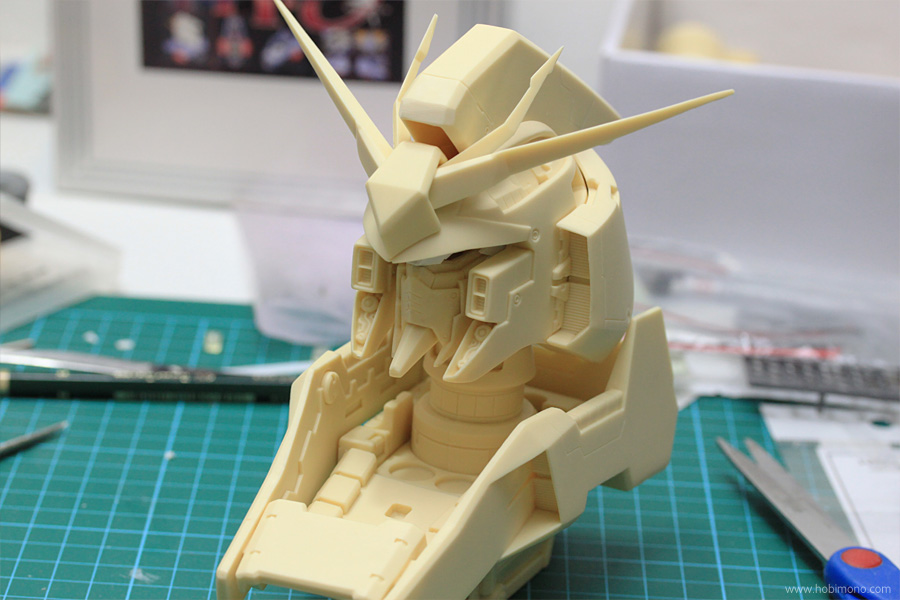
組裝起來了!


▲ Does that now look any better? What do you think, guys?
現在看起來較好一些?大家覺得怎麼樣?
現在看起來較好一些?大家覺得怎麼樣?

▲ More details are added to the facial area, and the first coat is sprayed on. Yes, I currently kind of enjoy it.
面部添加了更多細節,並上色了第一層塗層。沒錯,小生開始有點喜歡它了。
面部添加了更多細節,並上色了第一層塗層。沒錯,小生開始有點喜歡它了。

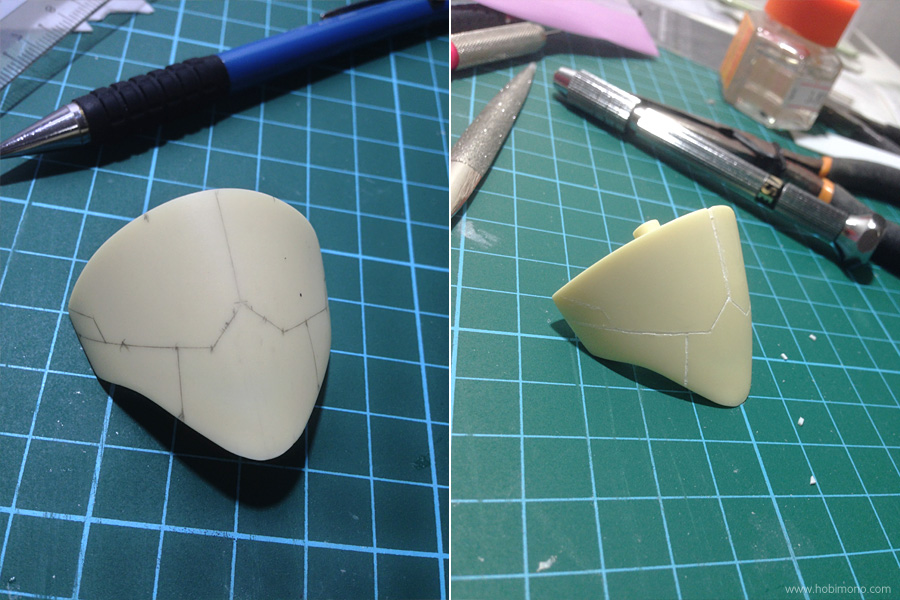
▲ Certain parts simply look too plain and require manual panel lining enhancement. I first draw a line with a pencil, then I use a needle to engrave it.
某些部分看起來太平淡,需要手動畫上刻線增強。先用鉛筆描繪待會兒要刻線的地方,然後用再用針來雕刻。
某些部分看起來太平淡,需要手動畫上刻線增強。先用鉛筆描繪待會兒要刻線的地方,然後用再用針來雕刻。

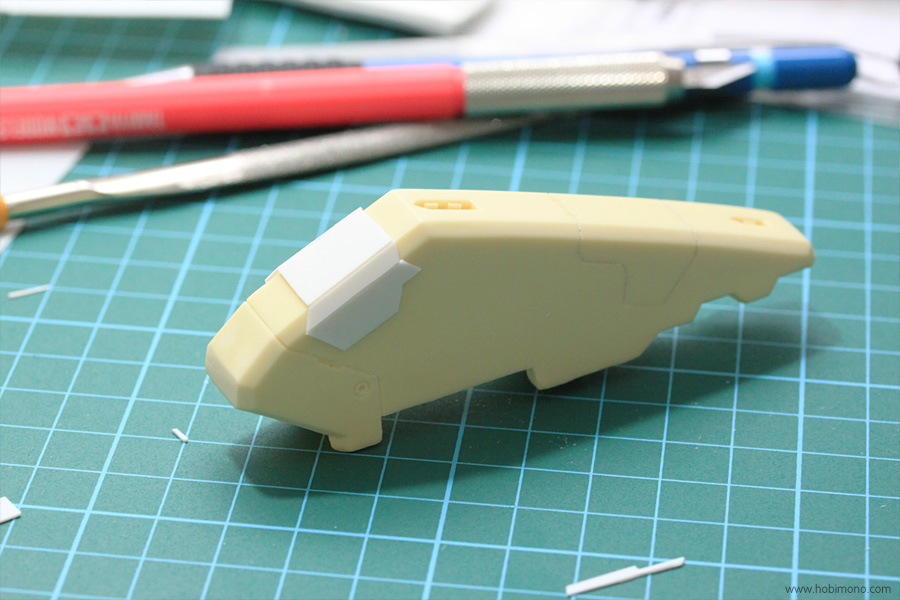
▲ I did modify this area as well because I found it to be a little too plain.
這確實也把這個部分給修改了,因為小生總覺得它有點太平淡了。
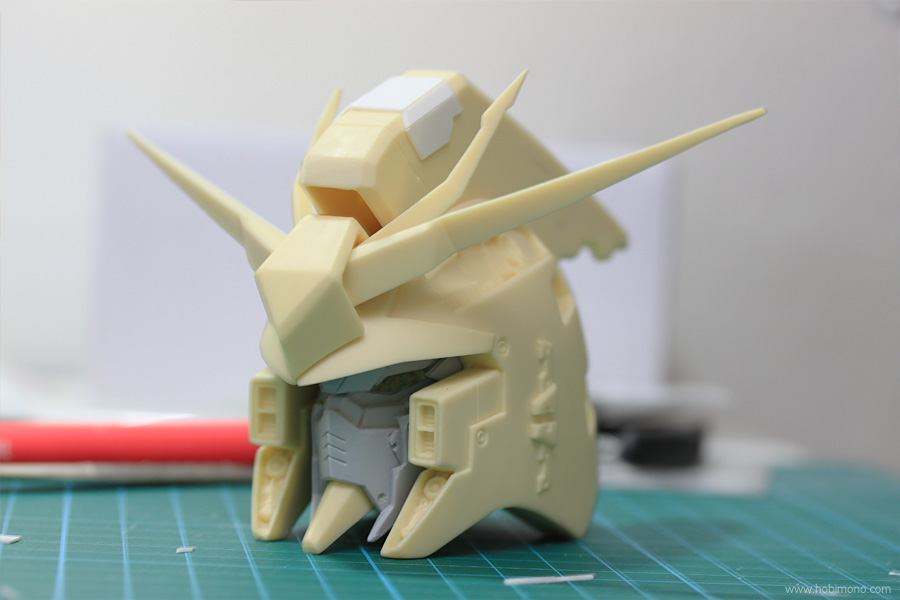
這確實也把這個部分給修改了,因為小生總覺得它有點太平淡了。

▲ Feeling good? Well, let's raise it higher, I guess.
感覺還好吧?嗯,讓我們把它給再提高一點吧。
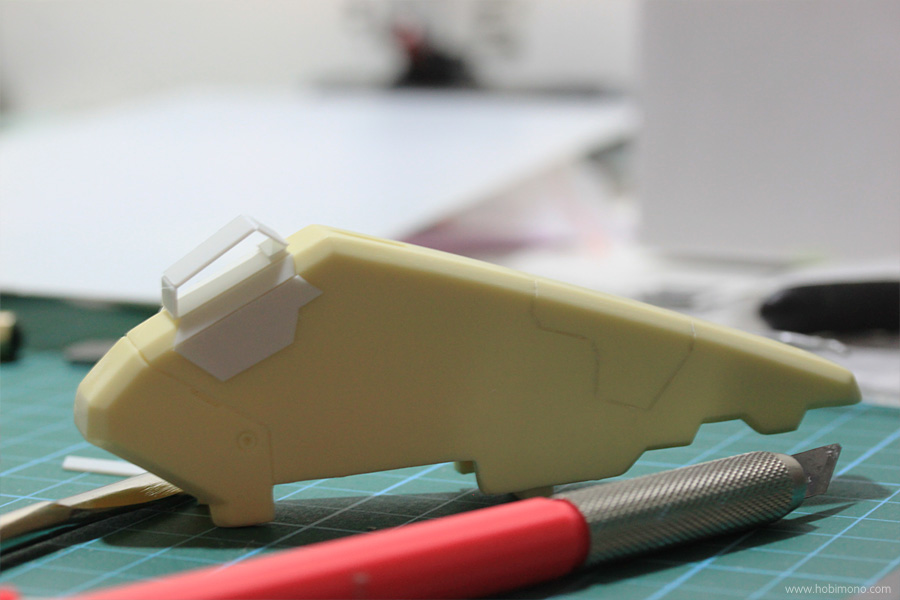
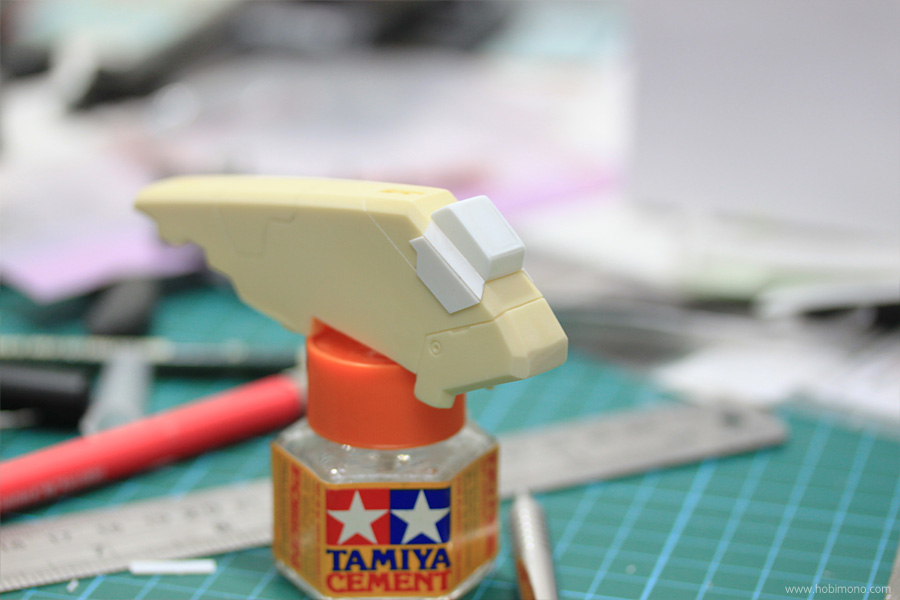
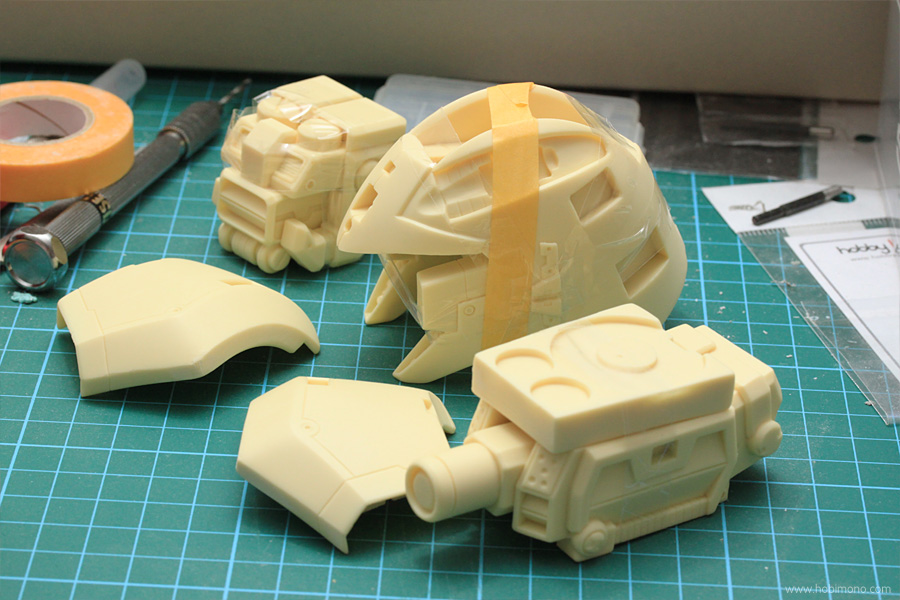
感覺還好吧?嗯,讓我們把它給再提高一點吧。


▲ And here we go!
好了!
好了!


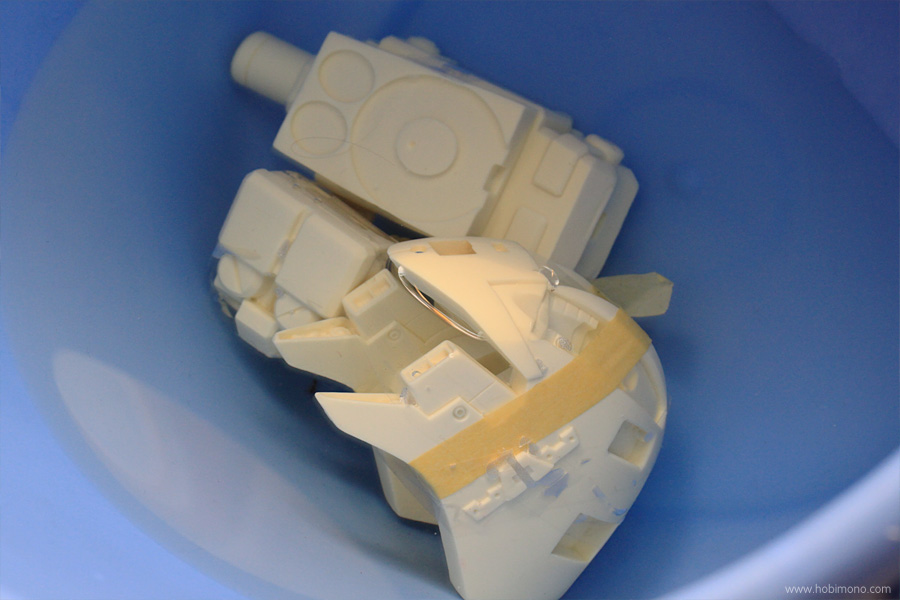
▲ When the left and right sides are joined together, I still notice a significant gap. To close the gap, I use the masking tape to secure the pieces and soak them in hot water about 15 minutes. This will soften the resin and helps to close the gap.
當左側和右側連接在一起時,留意一下還真的看見兩個組件一個明顯的縫隙。為了減小縫隙,小生使用遮蔽膠帶來固定各組件並將整個給浸泡在熱水中大約15分鐘,這將會軟化樹脂而且有助於減小間隙。
當左側和右側連接在一起時,留意一下還真的看見兩個組件一個明顯的縫隙。為了減小縫隙,小生使用遮蔽膠帶來固定各組件並將整個給浸泡在熱水中大約15分鐘,這將會軟化樹脂而且有助於減小間隙。

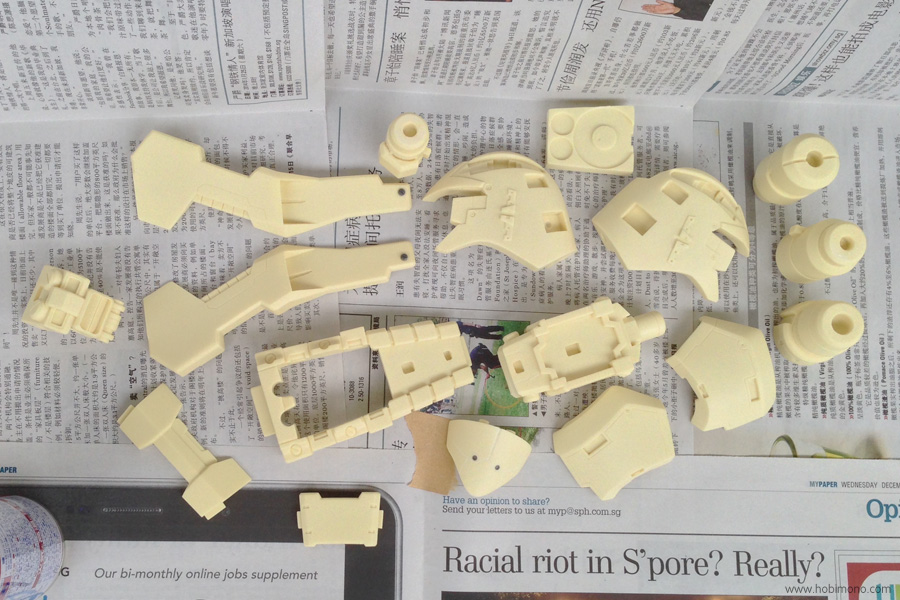
▲ Alright! The kits are finally prepared for spraying! Feeling excited!
好吧!套件終於可以上色了!非常期待!
好吧!套件終於可以上色了!非常期待!

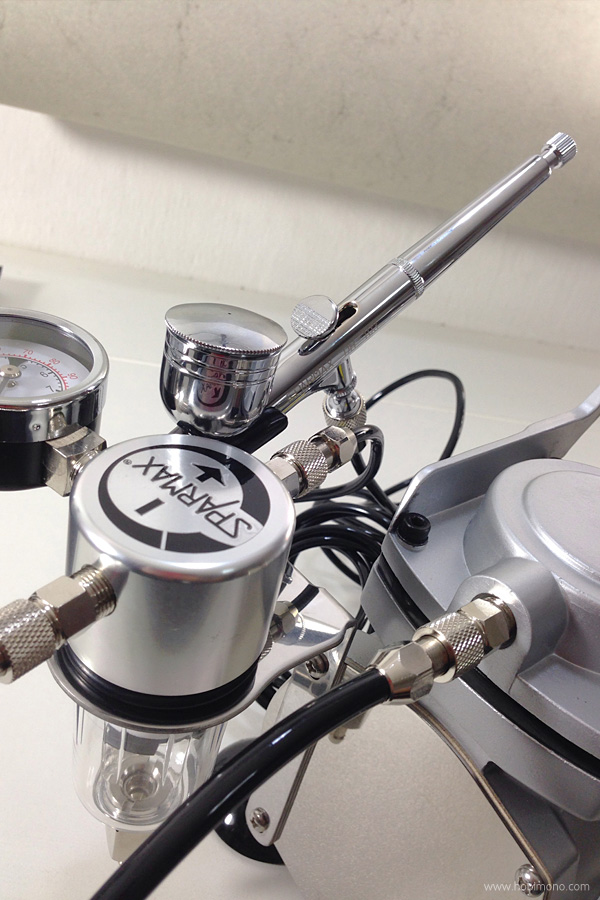
▲ This is the "Sparmax" airbrush set I recently purchased. I like it since it's compact and quiet.
這是小生最近入手的“Sparmax”噴槍。小生蠻喜歡它的,因為它小巧且安靜。
這是小生最近入手的“Sparmax”噴槍。小生蠻喜歡它的,因為它小巧且安靜。

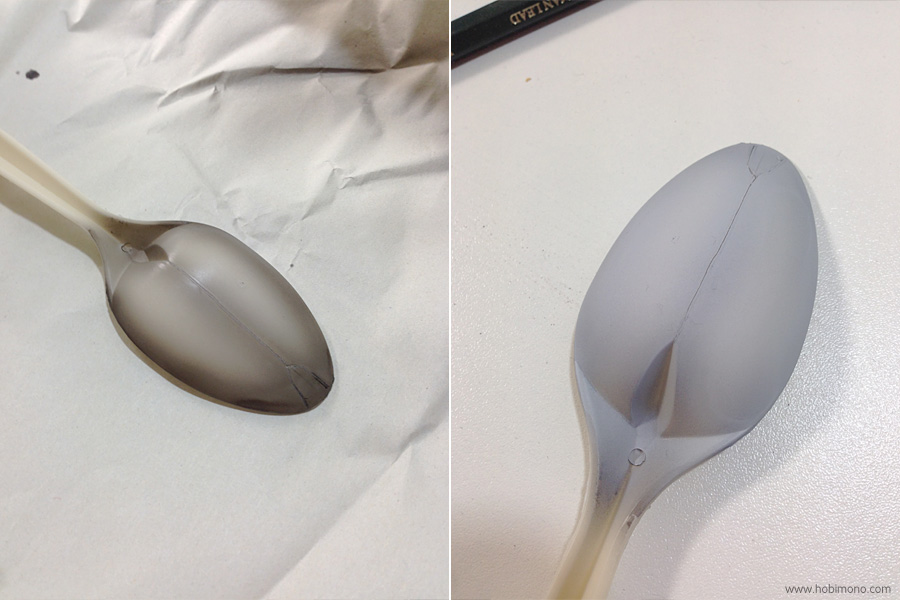
▲ Practicing shading before applying spray on the real object.
在實體上色之前先練習一下陰影的著色。
在實體上色之前先練習一下陰影的著色。


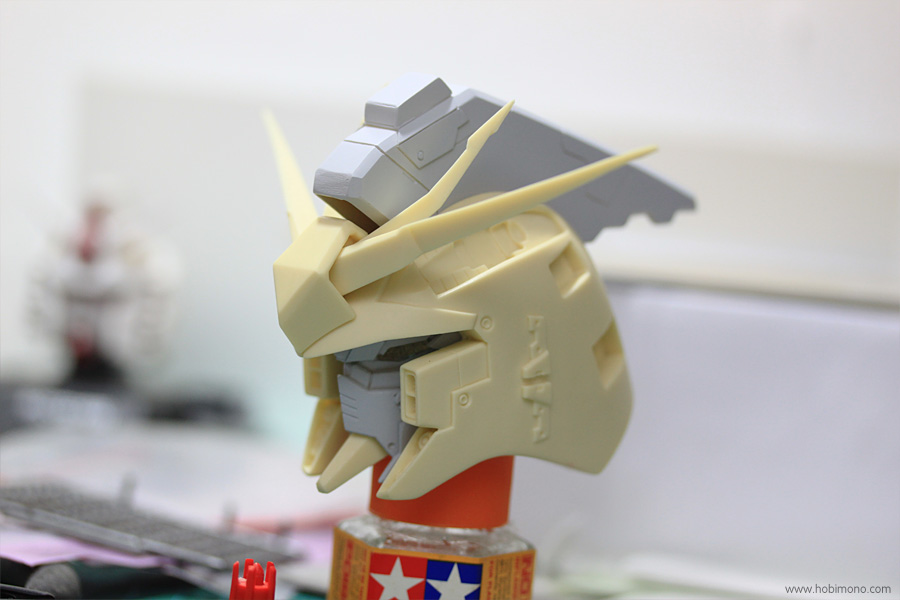
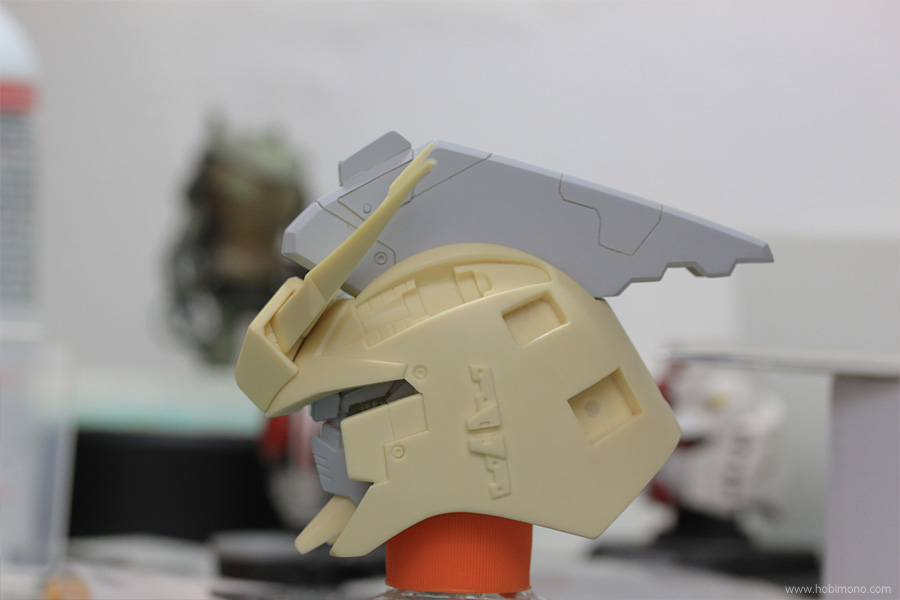
▲ I chose this shade of grey because it resembles the 3ds Max default shading.
選擇了這種灰色作陰影其實是因為它色調和 3ds Max 的“默認陰影”蠻相似的。
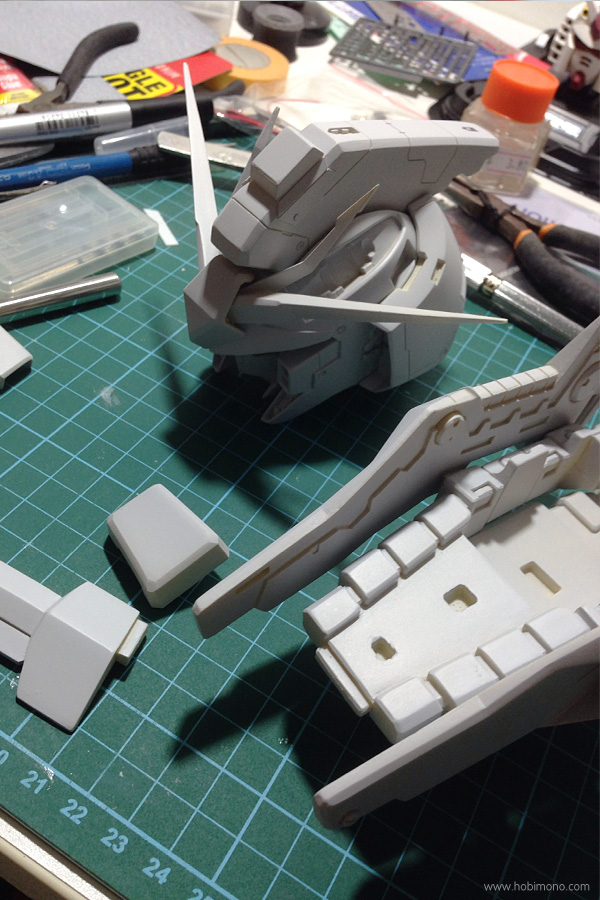
選擇了這種灰色作陰影其實是因為它色調和 3ds Max 的“默認陰影”蠻相似的。

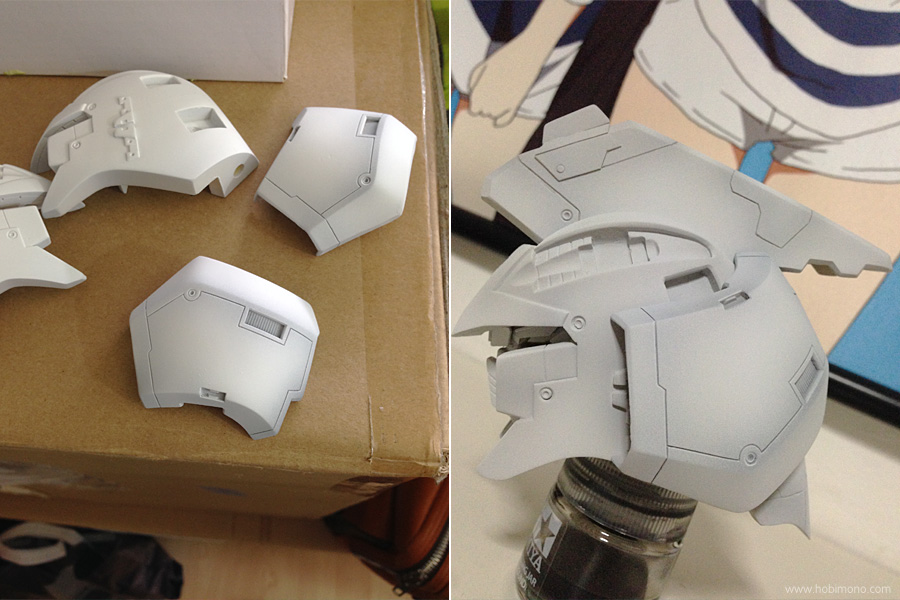
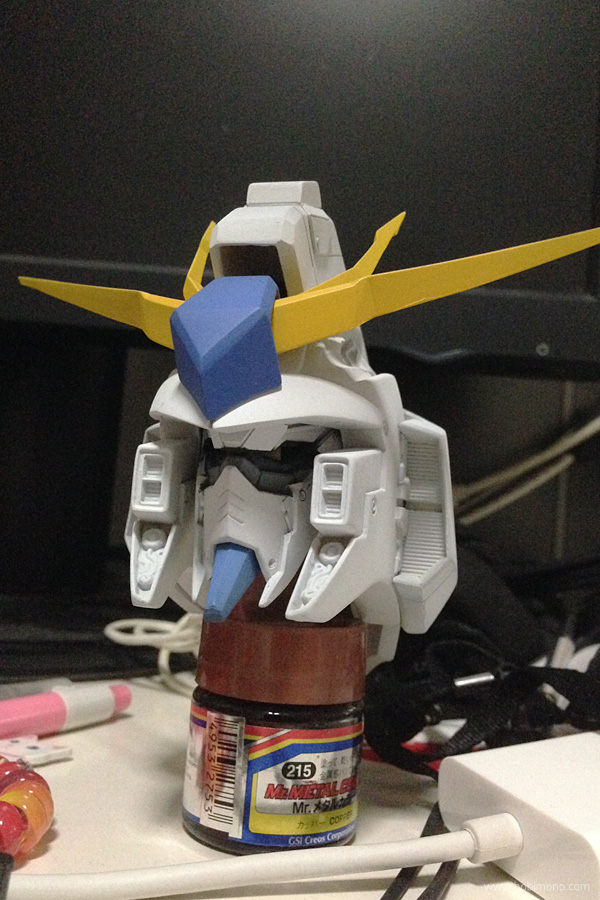
▲ Although I should wait until the very end to do this task, I simply cannot wait to see everything assembled in a grey coat. I'm intrigued to see how it seems.
雖然應該等到所有準備功夫做好後才開始組裝,但是小生實在是迫不及待地想看到整個套件組裝起來看起來如何的。
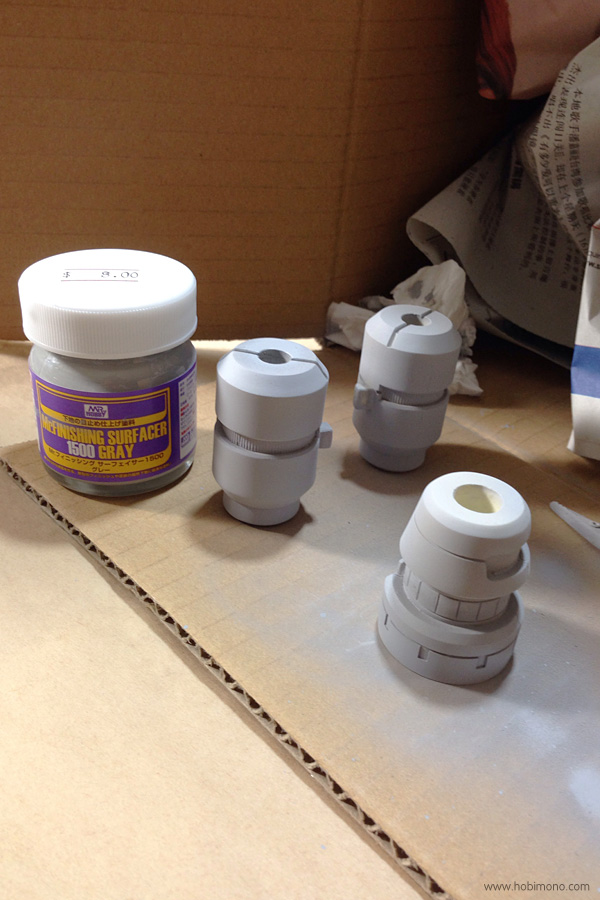
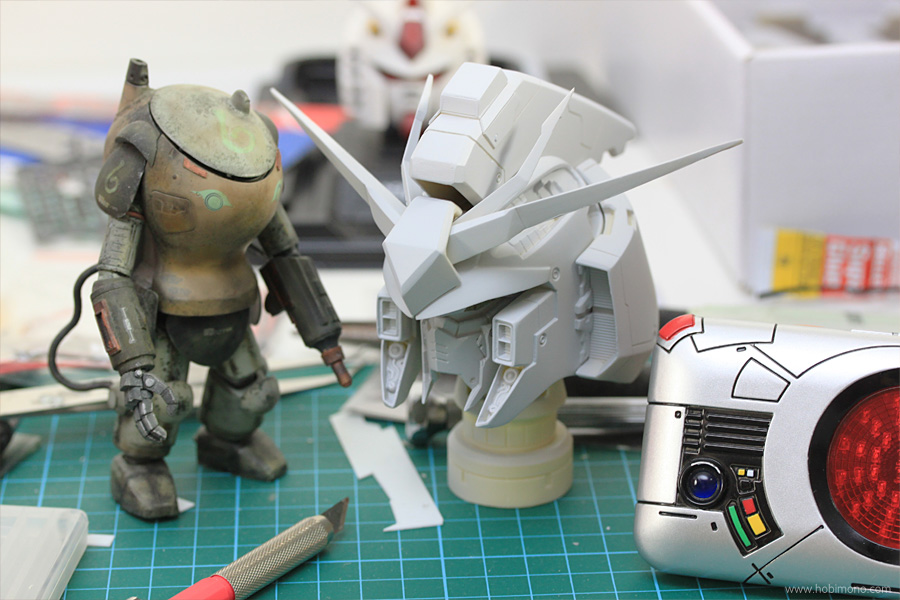
雖然應該等到所有準備功夫做好後才開始組裝,但是小生實在是迫不及待地想看到整個套件組裝起來看起來如何的。


▲ Pretty cool! The phone case, that is. LOL... Perhaps the Gundam or the Ma.k? Which do you like better?
好酷喔!是說手機殼,哈哈哈... 或許是高達或Ma.k?大家更喜歡哪個?
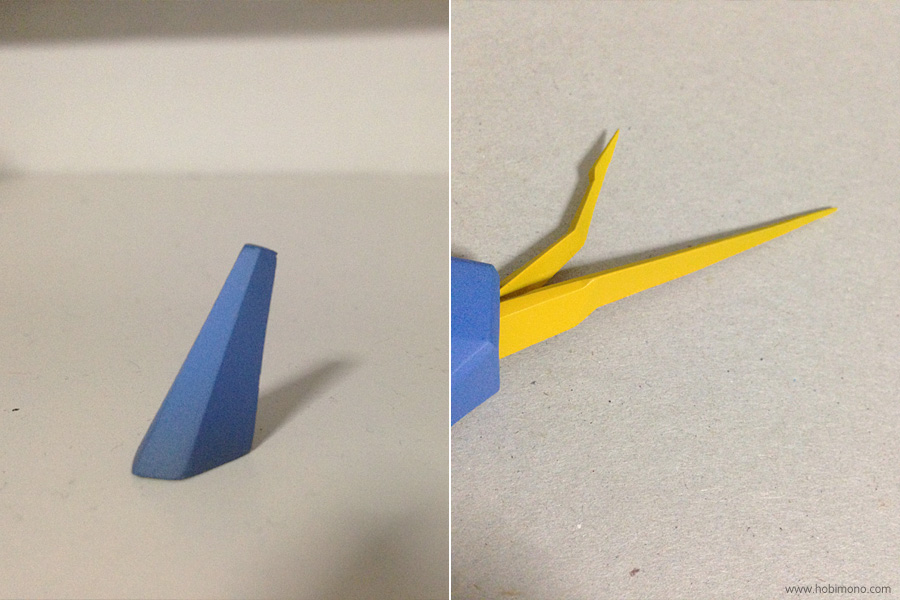
好酷喔!是說手機殼,哈哈哈... 或許是高達或Ma.k?大家更喜歡哪個?

▲ And finally, the shadow session. Personally, I prefer very soft, subtle shadows that are not overly evident since otherwise, I believe the model will appear very unclean and unnatural.
最後,陰影的部分。就個人而言,小生更喜歡不太明顯又非常柔和、微妙的陰影,否則,小生相信整個模型看起來更顯得髒兮兮的且不自然。
最後,陰影的部分。就個人而言,小生更喜歡不太明顯又非常柔和、微妙的陰影,否則,小生相信整個模型看起來更顯得髒兮兮的且不自然。

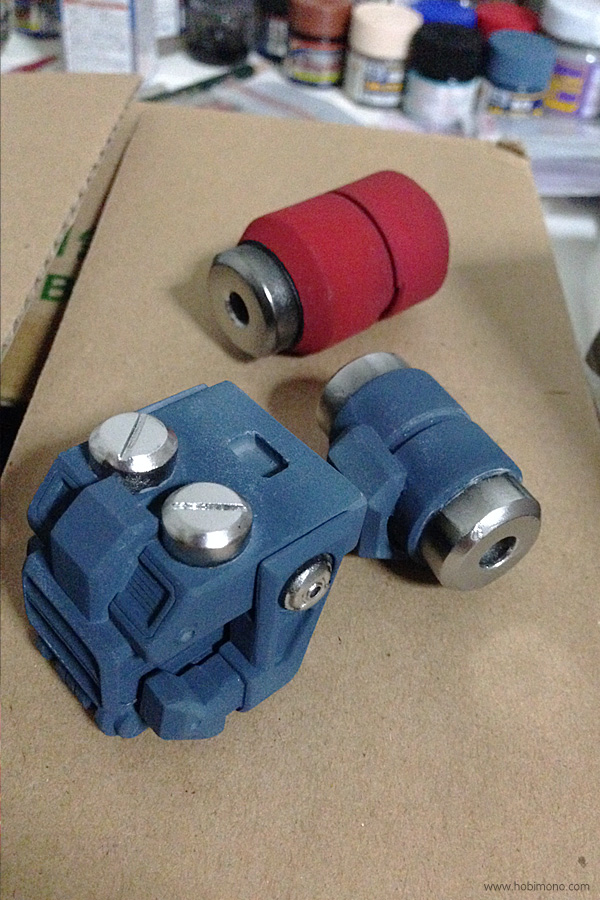
▲ Shading in the color blue.
藍色陰影部分。
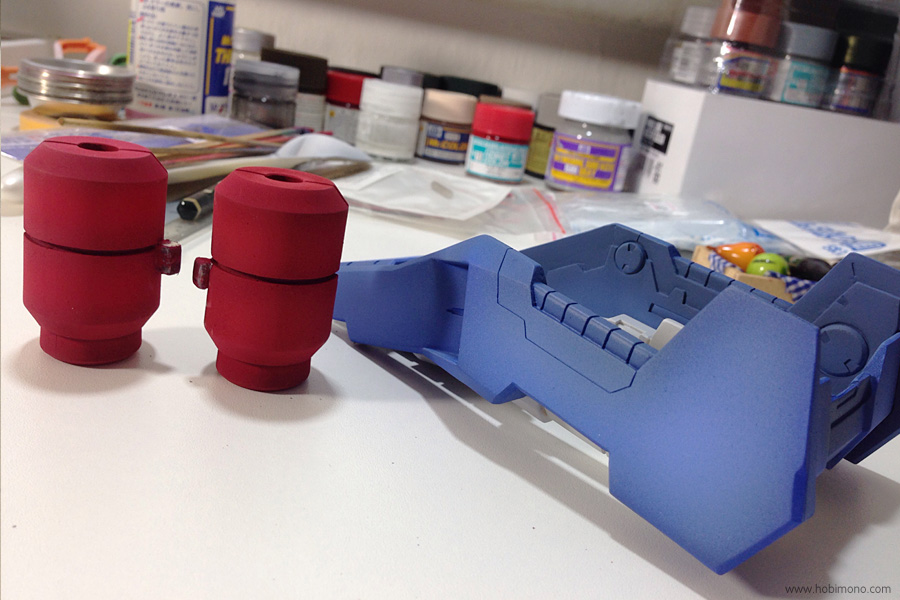
藍色陰影部分。

▲ For some reason, I was very happy with the shading; it reminded me of a 3D render with Global Illumination enabled.
基於某因,小生對陰影塗裝效果非常滿意;因為它令小生想起啟用了全局照明的三維渲染。
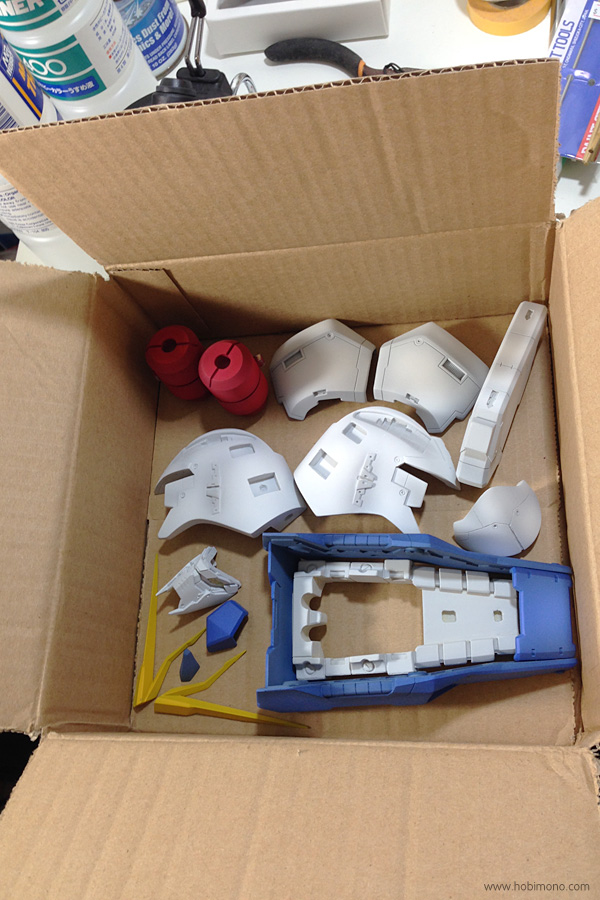
基於某因,小生對陰影塗裝效果非常滿意;因為它令小生想起啟用了全局照明的三維渲染。

▲ Before applying the final layer, place all the painted pieces in a box to prevent dust from adhering to them.
在上最後的塗層之前,先將所有零件放在一個盒子裡避免灰塵粘附。
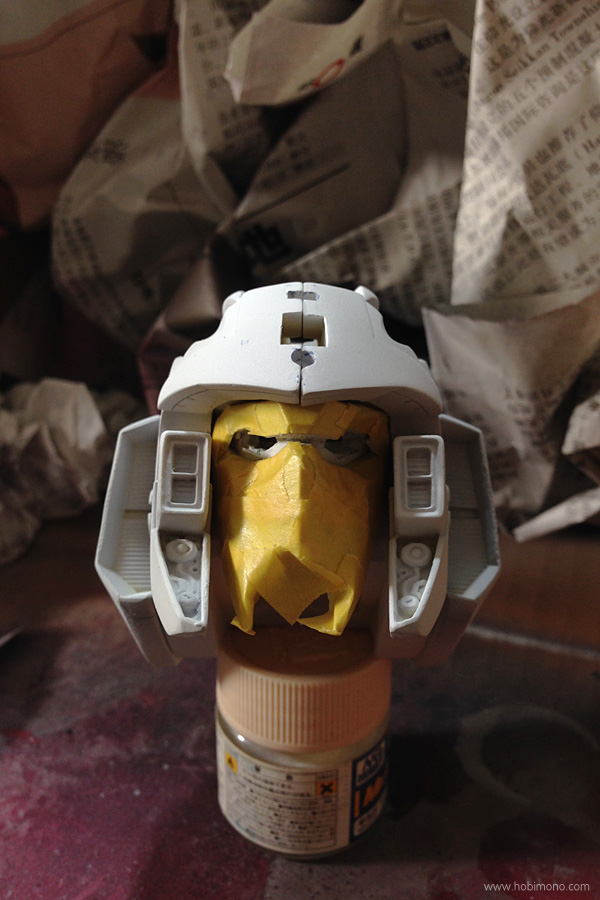
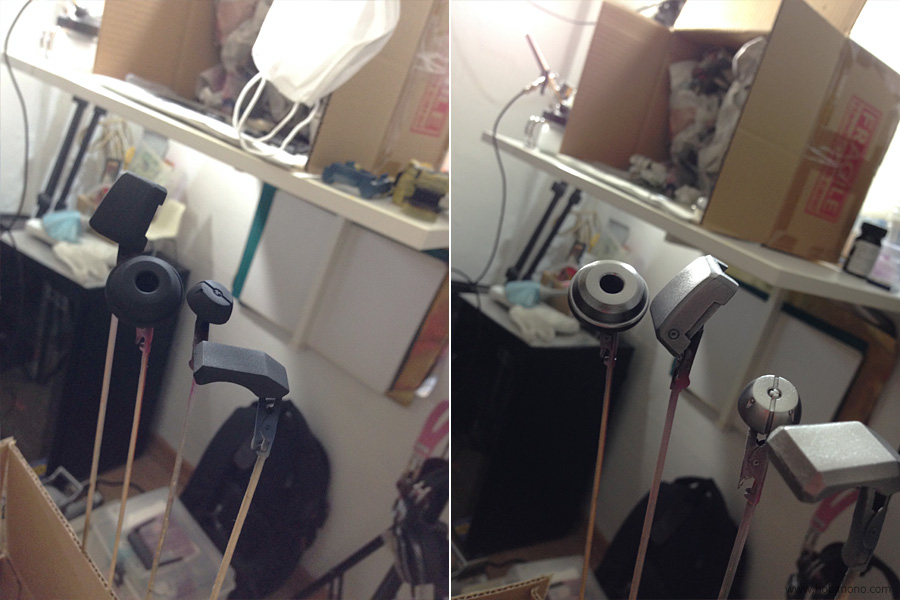
在上最後的塗層之前,先將所有零件放在一個盒子裡避免灰塵粘附。

▲ Although masking is the most difficult task, it must be completed.
防護工作似乎是最難的任務,但必須完成。
防護工作似乎是最難的任務,但必須完成。

▲ The end product will make you feel worthwhile after the masking work.
看到塗裝完成後的成品會讓您覺得之前辛辛苦苦做的防護功夫一切都是值得的。
看到塗裝完成後的成品會讓您覺得之前辛辛苦苦做的防護功夫一切都是值得的。

▲ The color of chrome is finished.
鉻色完成了。
鉻色完成了。

▲ Spray the matte black first, then a light coat of chrome color.
先噴塗啞光黑色,再噴塗淺鉻色塗層。
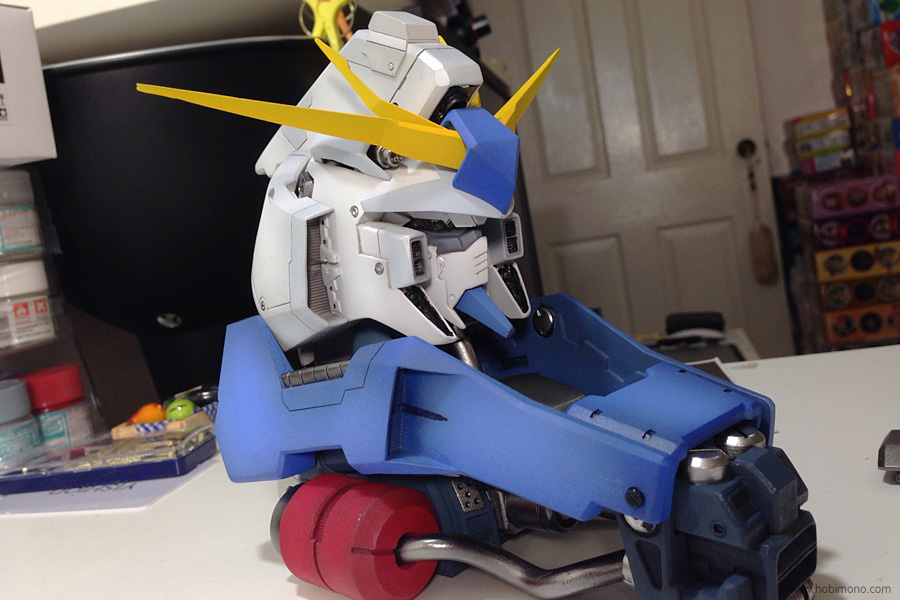
先噴塗啞光黑色,再噴塗淺鉻色塗層。


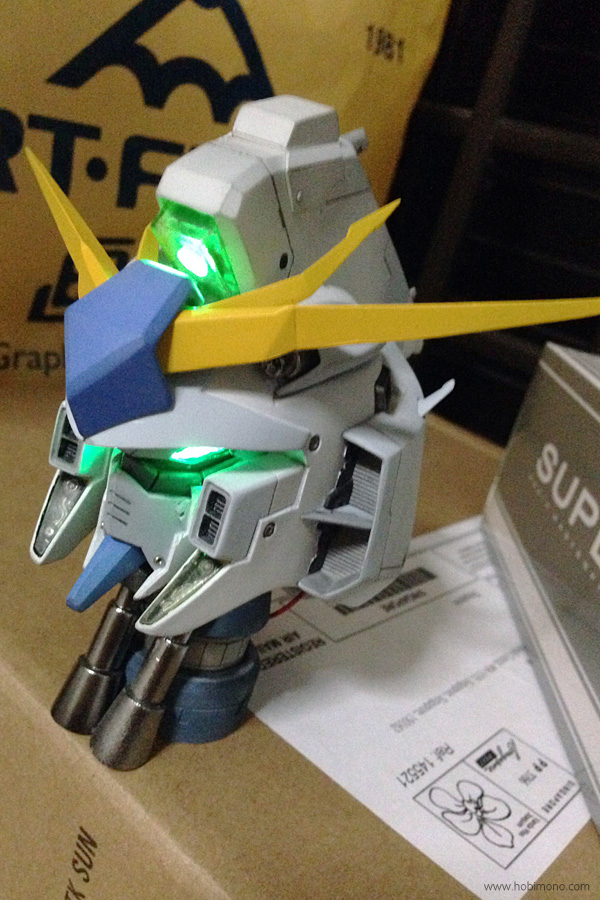
▲ Testing during assembly with the lights on!
組裝測試,亮燈!
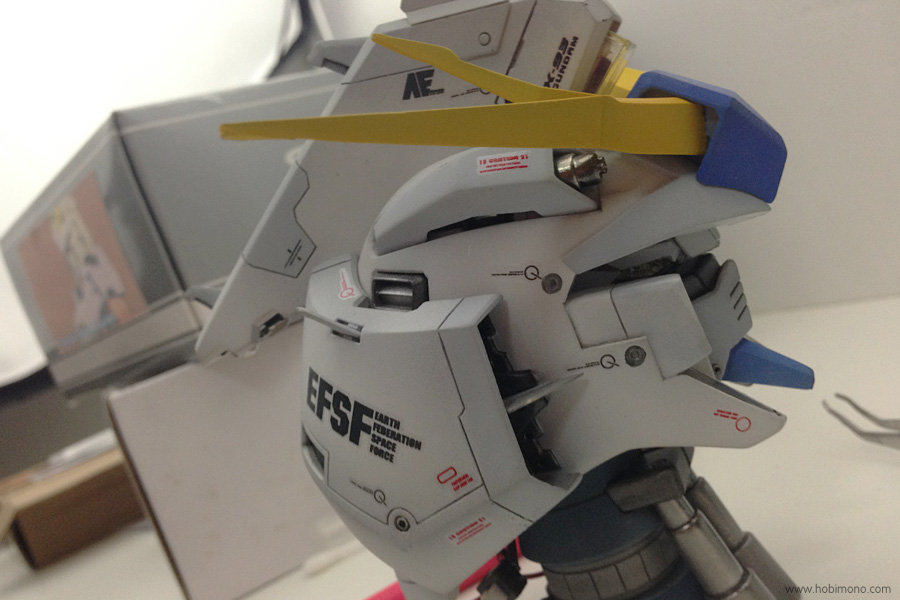
組裝測試,亮燈!


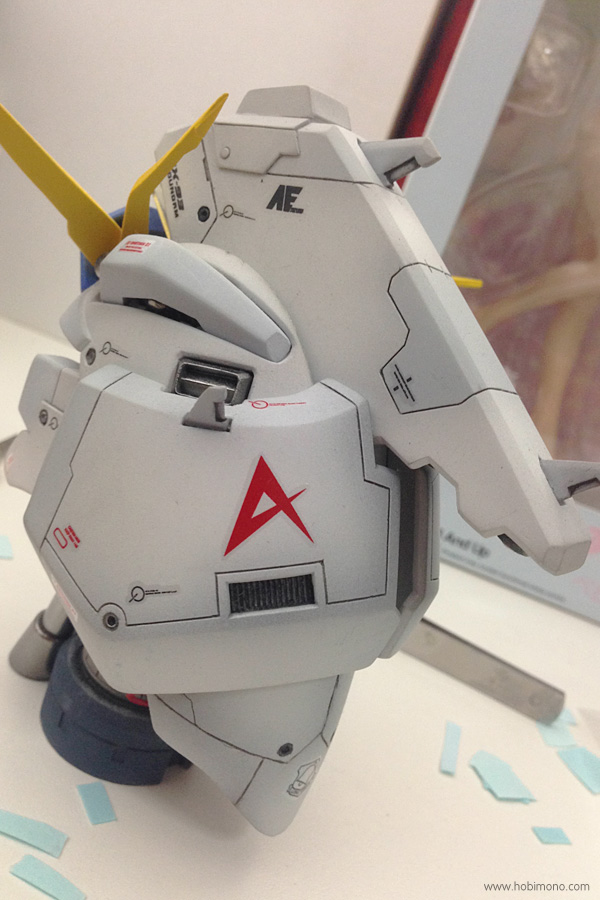
▲ Also to put on the decals.
貼上水貼。
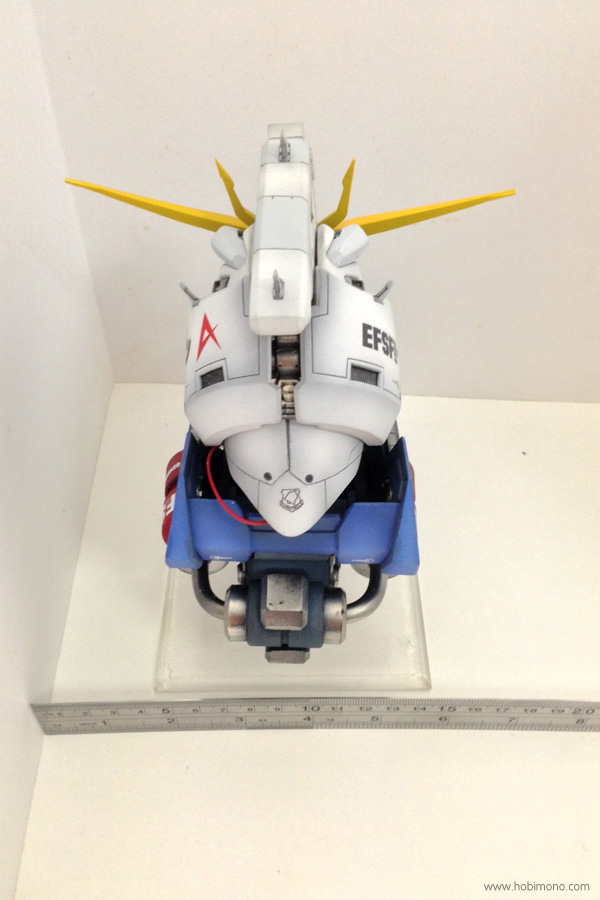
貼上水貼。


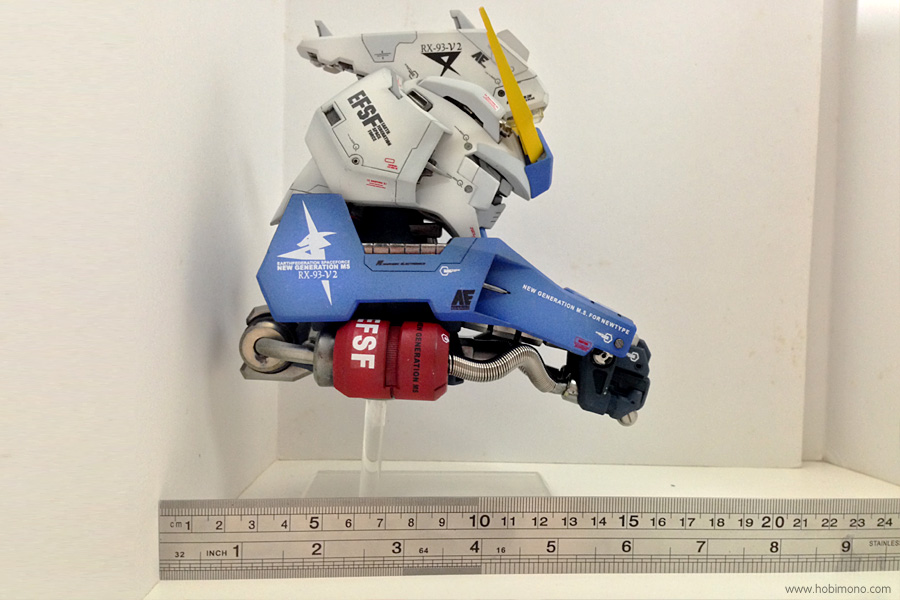
▲ Measure the area for the acrylic display.
先測量模型的尺寸以便過後訂製阿克力陳列箱。
先測量模型的尺寸以便過後訂製阿克力陳列箱。

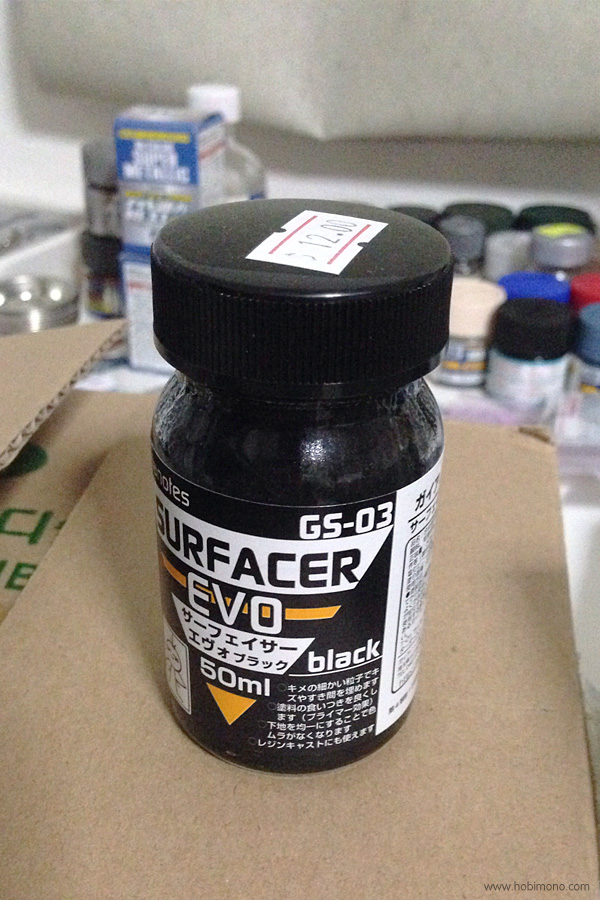
▲ I use this shade of matte black "GS-03 - Surfacer EVO Black by Gaianotes" to bring out the chrome appearance.
小生使用這款啞光黑色為 “GS-03 - Surfacer EVO Black by Gaianotes” 來突出鉻色的色調。
小生使用這款啞光黑色為 “GS-03 - Surfacer EVO Black by Gaianotes” 來突出鉻色的色調。

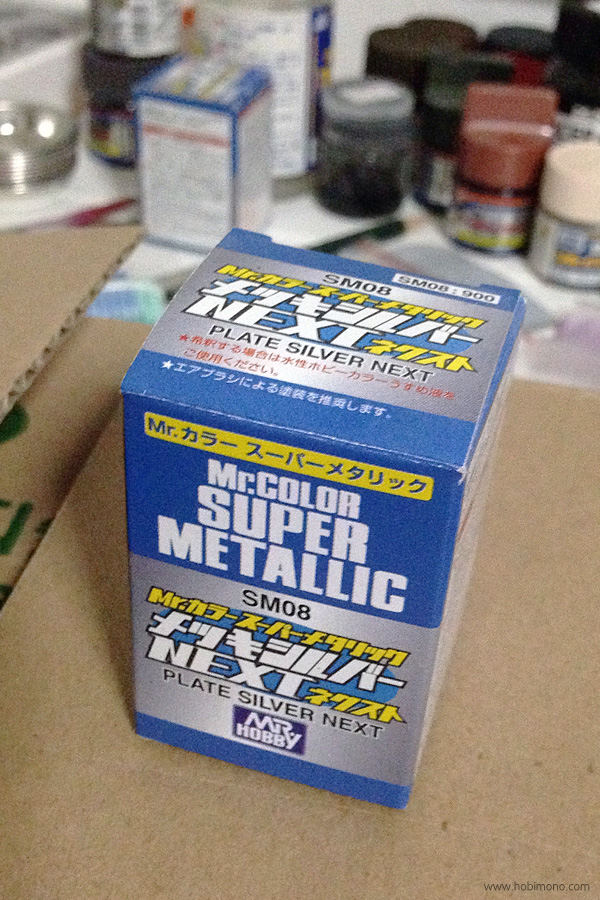
▲ I use this shade of chrome - (SM08) Plate Silver Next by Mr. Hobby.
鉻色調 - (SM08) Plate Silver Next by Mr. Hobby。
鉻色調 - (SM08) Plate Silver Next by Mr. Hobby。

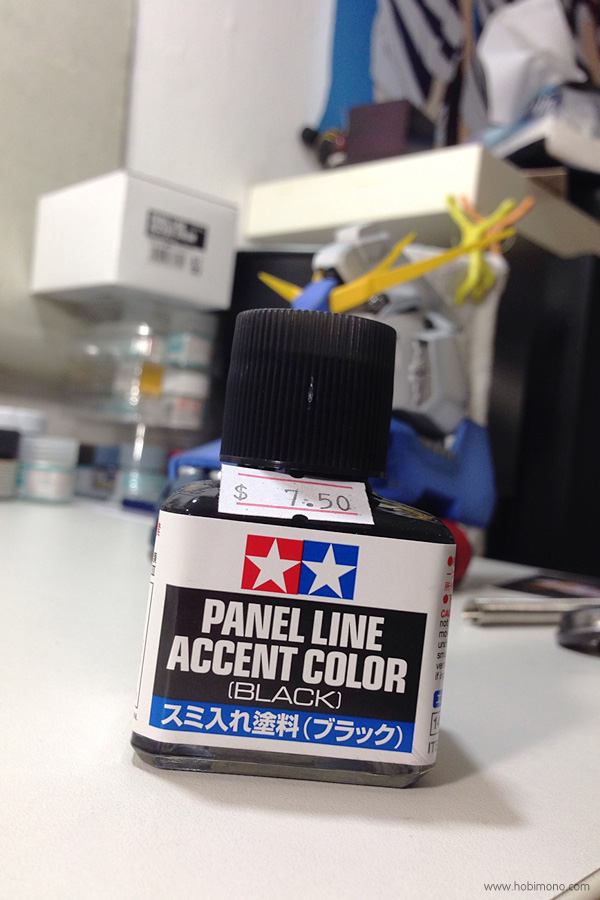
▲ And for lazy folks like myself, here is the panel line color by Tamiya "Panel Line Accent - Black". Really, though, only the lazy will play Resin Kit. By the way, with matte black and a certain quantity of thinner, you may create your own panel line color.
對於像小生這樣懶惰的人就選用了 Tamiya 的刻線用塗料 “Panel Line Accent - Black”。不過,實際上,只有懶惰的人才會玩 Resin Kit 吧。順帶一提,使用啞光黑和一定份量的稀釋劑,大家還可以調製出屬於自己的刻線顏色喔。
對於像小生這樣懶惰的人就選用了 Tamiya 的刻線用塗料 “Panel Line Accent - Black”。不過,實際上,只有懶惰的人才會玩 Resin Kit 吧。順帶一提,使用啞光黑和一定份量的稀釋劑,大家還可以調製出屬於自己的刻線顏色喔。
So, thanks for spending time to see my very first the making of Resin Kit model, and i hope you enjoy it, and sure please do not hesitate to leave comment if you have any question or cool suggestion on this work. we can discuss together! see if we can do some cool thing in the future! have fun everyone!
感謝大家花時間閱讀小生的第一個 Resin Kit 模型製作過程,希望大家會喜歡,如果大家有任何疑問或不錯的建議,請在留言區寫上留言喲。咱們可以一起討論!

Related Item
Comments


